Tuesday, September 6, 2011

Assignment 3- The making of Pulau Kapas website (Using dreamwearver)

Step 1
Insert table, set column as 3 and row as 0.
Step 2
Click the first column and insert the flash that i made before.
Step 3
Prepare 2 piece of HISTORY image, one is for front and the other is for back. To make an effect when the mouse go over the image, it will turn to the other image. Insert> Image Object> Rollover image. The original image browse from computer that make it front and the rollover image browse from computer that make it back.
Same as Step 3 for the GEOLOGY image.
Then go to the properties which is below choose link for BOTH image.
For HISTORY, it link to Introduction1.html and for GEOLOGY, it link to Introduction2.html.
Step 4
Open another HTML named as Introduction1. Then insert table, row as 0 and column as 2.
Step 5
Insert BACK image using the step 3.
BACK image link it to the Introduction.html.
Step 6
Click the first column and insert image. Insert > Image.
Step 7
Click the second column to type the description and the history of Pulau Kapas.
Step 8
Open another HTML and named it as Introduction2. Repeat the Step 4 till Step 7.


The introduction part (my part) is finished ^^

Assignment 3- The making of flash (introduction)

Step 1
Create a new file with ActionScript 3.0 and modify the document like it’s shown on the screenshot below. Then enter the document properties via the admin panel or pressing Ctrl+J. Choose black colour.
Step 2
Add 6 images from computer to your library. To do this press File > Import > Import to library.

Step 3
Create 6 layers and give them the names Buttons, Images 1, Images 2, Images 3, Images 4 ,Images 5 and Images 6.
Step 4
Click the button layer and drag the images from library to the stage. Then modify their size to 114×85 px and arrange them like a button. Drag the first frame up to the 149 cell to copy it.
Step 5
Switch to the Images layer and select the first frame on the timeline. Drag the image that corresponds to the first thumbnail from library to the stage. Size it down to the 500×268 px and set its position to the 100×18.
Step 6
Click on the image and right click, then choose create motion tween.
Then go to the colour effect there and choose brightness and make it become -100%.
Click on the timeline and choose reverse keyframe. Repeat step 5 and 6 for the following 4 picture.
Step 7
Drag the last picture from library to stage and size it 520 x 380px and it position is 100.3 x 8.0 as the end of this flash.
Step 8
Save it up and go to publish setting to publish it as a flash. Go to File > Publish Settings> Publish > Ok.
This flash was done by these easy step. Hope you enjoy it. ^^

Saturday, August 20, 2011

Assignment 3- Pulau Kapas (Introduction part)

Description on the individual link
The creation of this individual link is to introduce the history and geology of Kapas Island. The images of the kapas island are present to show how nice is the island. The description of the history and geology can let the viewer get more information on the Kapas Island.

Objective of the link
The main objective of this link is to introduce the Kapas Island's history and geology to all the viewer. This link also provide the viewer which are going to Kapas Island to know more about it. Then they will know which beach is bigger or the location of the garden or hotel.

Design of GUI

This is the initail layout for my group's website. On the top of the left side, it will be our group logo. Beside the logo, it is my group's designed banner and other subtopic banners. There will be 6 buttons below the banner. Each button represents different links and each links will be design by our different member. So it gonna show out different style of our group member. Below the button, it will be the content. So when you click on the different button, it will show up different content. And the content will based on the subtopic present it out. Normally the content will be present by words, image, flash and video. Below the contents, it will be the signature of my group (copyrighted).

Layout and Flowchart for the Individual site- Phoon Yip Lynn( Introduction)
I'm going to use this layout as my individual site page (INTRODUCTION). When the viewer is click on the button of introduction, this layout will be coming out. The top of the left side is our group logo. Beside the logo, it will be the subtopic banner which means is for the introduction banner. Below the banner, it will be the button for other links. I'm going to put flash inside my individual site which locate at the left side of the content. The right side will be 2 button which are named by HISTORY and GEOLOGY. When the viewer click on the history, it will come out the history of Kapas Island. To be a friendly user website, i will create a back link under the content. So when the viewer finish read about the history, they can click on the back, to get into the homepage of the introduction webpage. After that, they can click on the geology to get more information about Kapas Island. Below the content, there will be always our group's signature (copyrighted).
This is the flow chart for doing my individual site (introduction).
Photoshop and flash will be used to create the logo, banner, button and other image.
The dreamweaver will be used for create the website.


Friday, July 22, 2011

Final post for ewallpaper (B part)

Continue from part A~
The e wallpaper is almost done~

Step 9~> Retone the image
Go to image>auto colour.
You can see that the colour is a bit brighter than just now.
Then use dogle tool to make the place that u want it bright.
i use dolge tool on the open day.

~FINAL RESULT~

Final post for ewallpaper (A part)

After the consult of mdm lydia, i had change my mind for the ewallpaper.
So i decide to do a new one~ Here
is the step that use for my ewallpaper~
The pictures below are the material that i use for my e-wallpaper.


Let's see that how i do my e-wallpaper

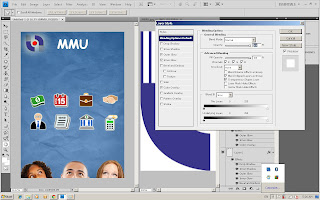
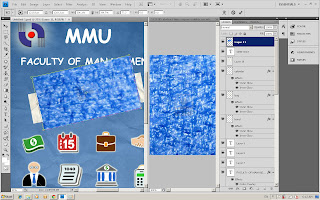
Step 1~> Open the blue paper and resize it.
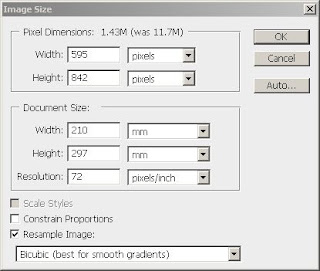
The steps are like this: Image>Image size
Go to the document size there.
Width:210mm
Height:297mm
Resolution:72 pixels

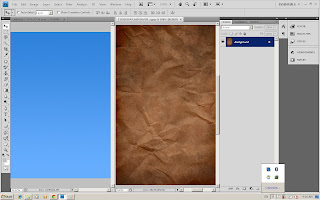
Step 2~> Prepare a crumbled paper
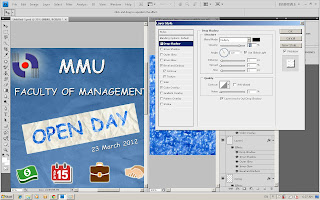
Then press ctrl + alt+ u (Hue/saturation)
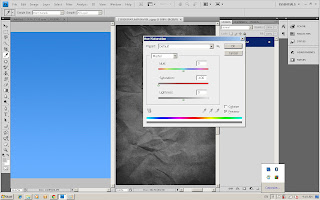
Then change it become
Hue: 0
Saturation: -100
Lightness: 0
The paper become grayscale
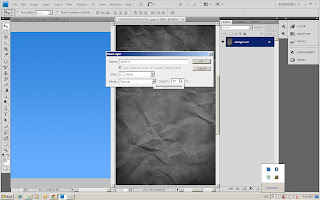
Right click on the layer then change the opacity: 35%
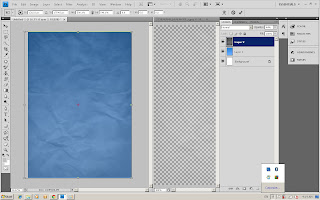
Use move tool to move the crumbled paper to the background.
As you can see the paper is a bit darkness then just now and got the crumbled effect.
The background was done~

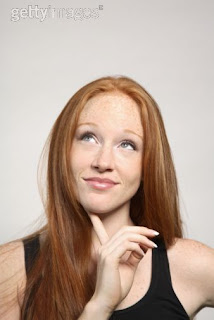
Step 3~> open an image
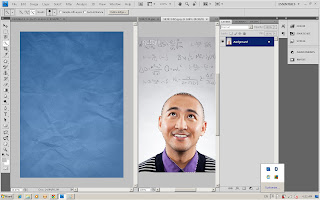
Use selection tool to select the image that i need for my ewallpaper.
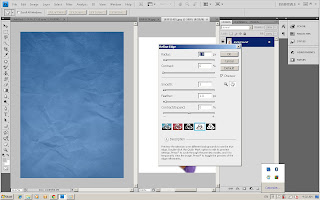
Then use refine edge to make the image become smooth.
Radius: 1.0
Contrast: 0
Smooth: 3
Feather: 1.0
Contract/ Expand: 0
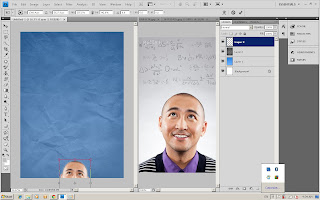
Then ctrl+ c (copy)and ctrl+v (paste) to paste the image to the background.
Repeat all the step for the other image.
The final result that using selection tool and refine edge for my e-wallpaper.

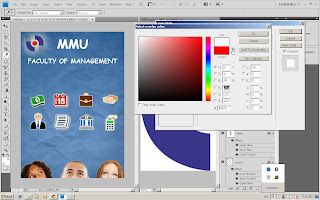
Step 4~> Open the MMU logo
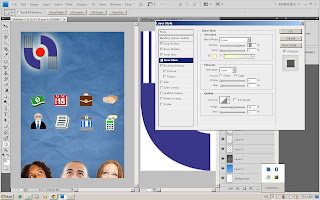
Using selection tool to select the logo and use move tool to move to the background.
Then go to the layer style to add effect on the logo.
Choose drop shadow, inner shadow, Outer glow, inner glow, bevel and emboss.
For the inner glow :
Blend mode: Screen
Opacity: 75%

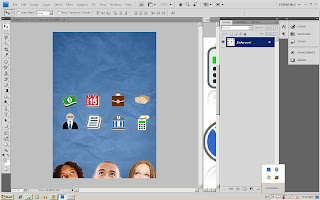
Step 5~> Put effect on the icon
Go to the layer style.
Choose the inner glow and outer glow.
Repeat this step to all icon.

Step 6~> MMU word
Using text tool to type MMU.
Then rasterize layer the layer.
Go to the layer style and choose outer glow, inner glow and colour overlap.
Do the same step for FACULTY OF MANAGEMENT.
The text are done~

Step 7~> white crumbled paper
Use the move tool and move the white crumpled paper to the wallpaper.

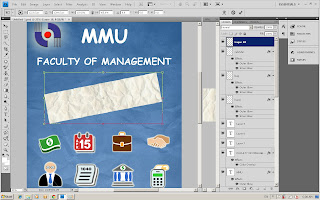
Then use Free Transform to transform the size the the way of putting it.
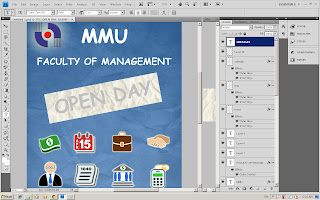
Use text tool to type OPEN DAY on the crumpled paper.
Then open a blue texture image and use move tool to move the image
to the OPEN DAY word.
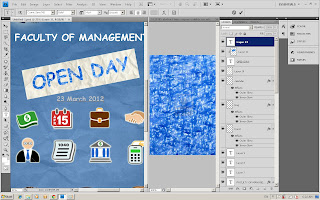
Go to the layer and right click. Select create clipping mask.
Then you can see that open day is in blue texture.

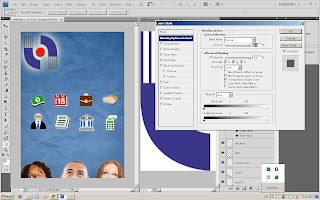
Step 8~> effect on the text
Go to the layer style, and choose drop shadow.
Blend mode: Mutiply
Opacity : 75%
Angle: 120


TO BE CONTINUE ~~~